Code GenerationLast updated: 1/6/2026
With your SQL enhanced with the SQL+ Semantic Tags, it's time to put the SQL+ Code Generation Utility to work.
1. Launch the Builder
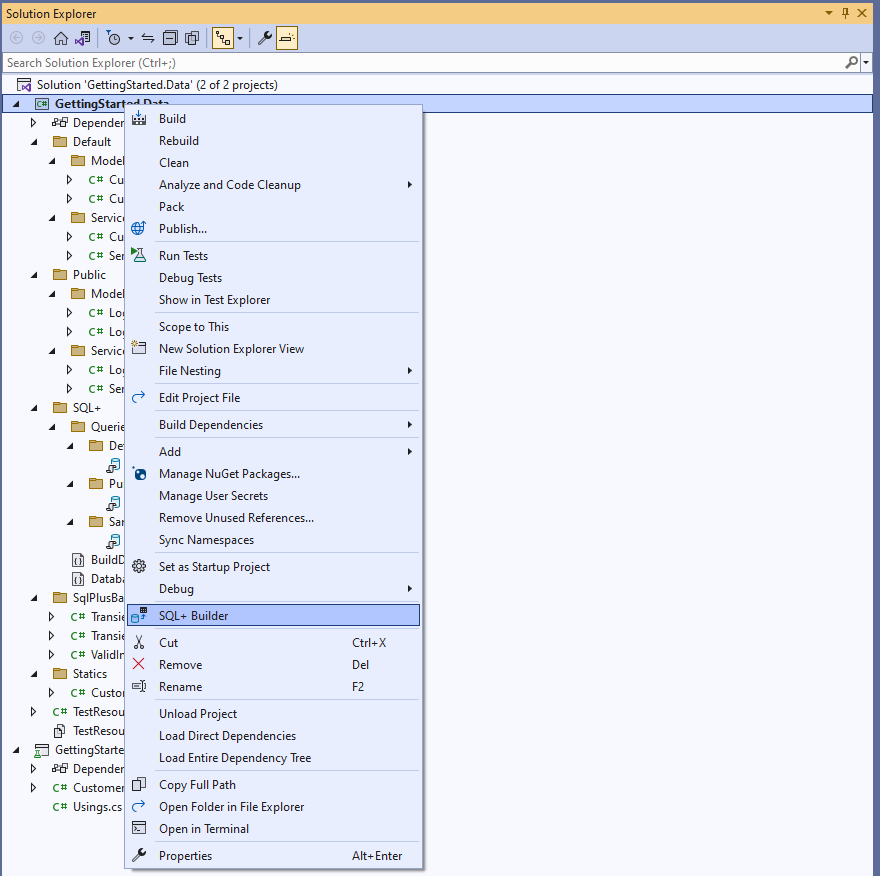
Right click your project and choose the menu option "SQL+ Builder" to launch the SQL+ Code Generation Utility.
2. Configure Database Connection
Enter your database type and connection string for the database that hosts the objects you intend to build.
Note that even if you are only building ad-hoc queries, this connection must still align with the database that hosts the objects referenced from the ad-hoc queries.
If you are not familiar with connection string syntax, help is available at ConnectionString.com
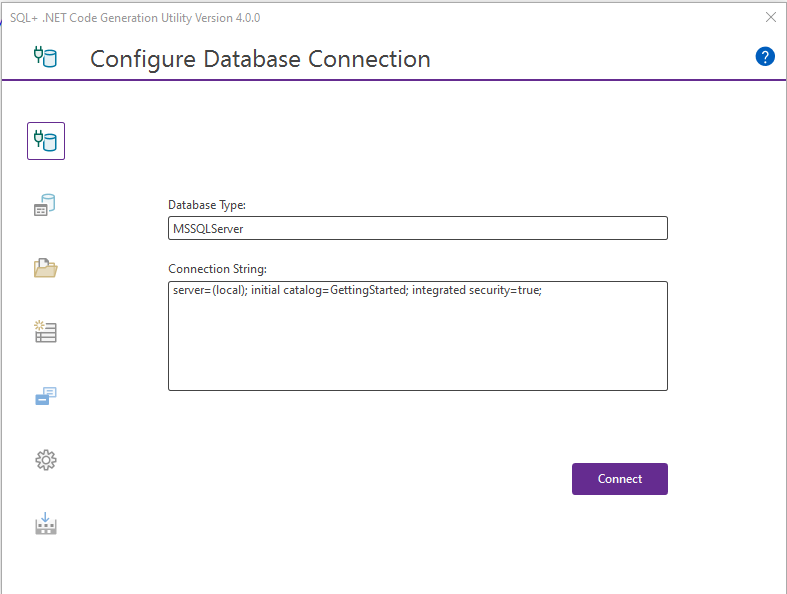
Once you have filled in these values, click connect to load the build objects into the UI.
3. Configure Database Routines
After connecting to the database, any database routines that include the SQL+ Routine tag will be displayed in the Configure Database Routines area.
Note that any routines that have errors will be highlighted in red, and a red dot will appear along side the button. The error message provided should help to resolve any errors.
At any time you can click the button to clear the errors and reload the objects.
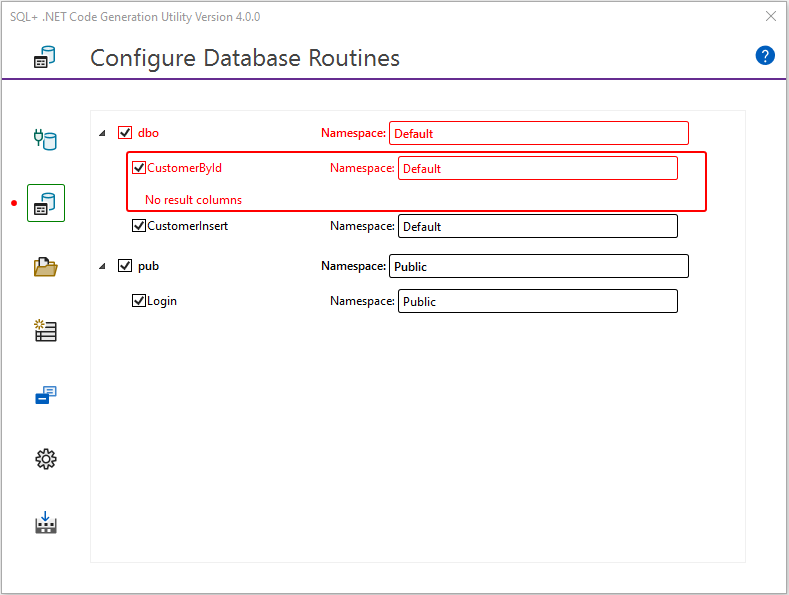
Once you have cleared any errors, use the text inputs to assign your routines to a namespace. This can be done at the schema level, where it applies to all routines in the schema, or, you can assign each routine to a particular schema.
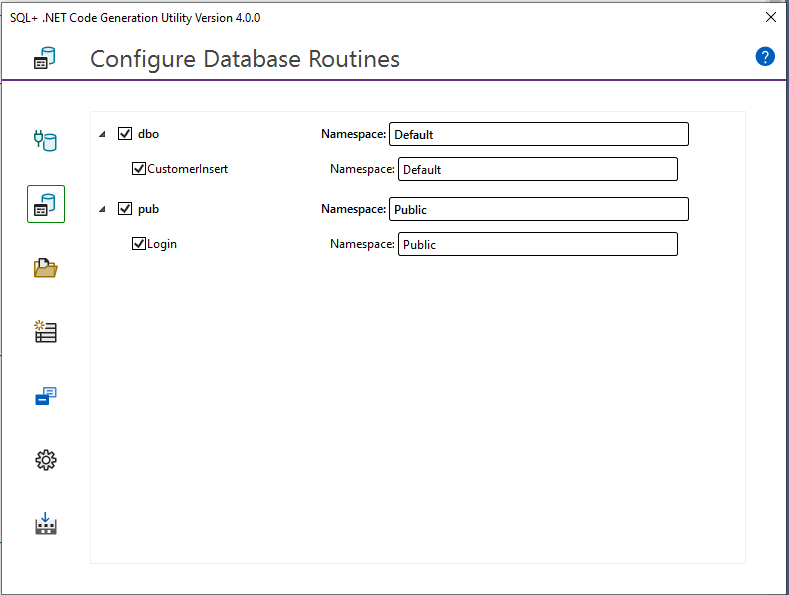
Once you are satisfied with your database routine configuration, you can move on to the Ad-Hoc Queries area.
4. Configure Ad-Hoc Queries
If you have any ad-hoc queries in your project, they will be displayed here. Unlike routines, when using ad-hoc queries, it is the folder structure that dictates namespace assignments, where each subdirectory of the Queries folder becomes a namespace, and the name of the file is utilized for the name of the generated service.
Note that any ad-hoc queries that have errors will be highlighted in red, and a red dot will appear along side the button. The error message provided should help to resolve any errors.
At any time you can click the button to clear the errors and reload the objects.
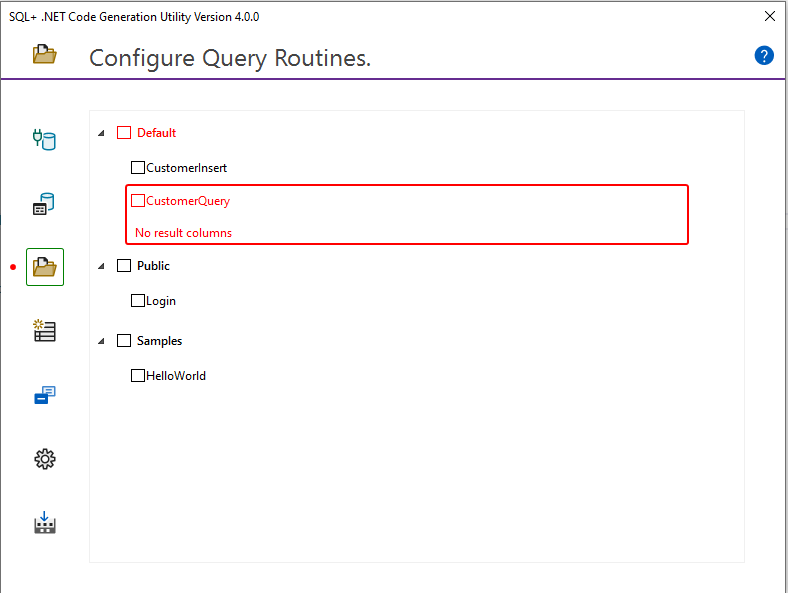
Once you have cleared any errors, select the queries you wish to include in the build. This can be done at the folder level, where it applies to all queries in the folder, or, you can select individual queries.
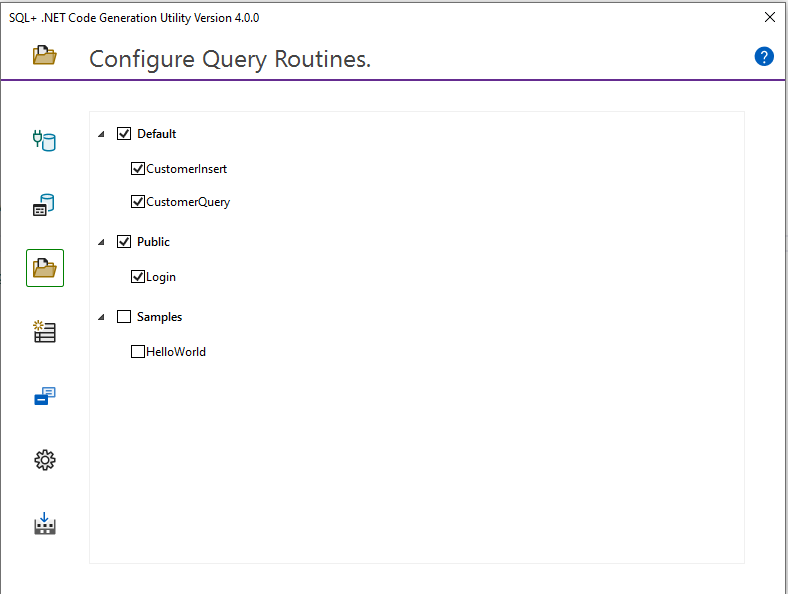
Once you are satisfied with your ad-hoc queries configuration, you can move on to the static lists area.
5. Configure Static Lists
Class definitions, as well as populated lists of static data will be created for each query defined in the builder. Simply write your query and paste it into the builder.
Note that any static queries that are invalid will be highlighted in red, and a red dot will appear along side the button. The error message provided should help to resolve any errors.
At any time you can click the button to clear the errors and reload the objects.
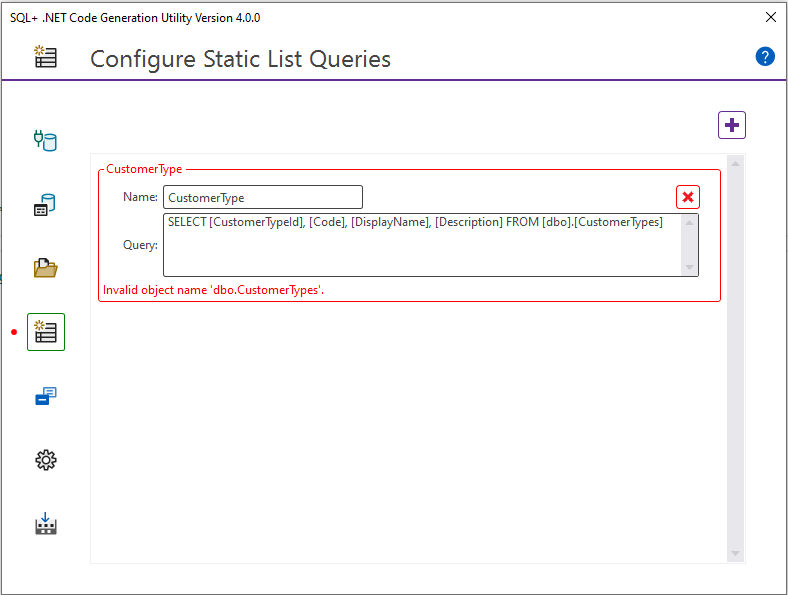
Once you have cleared any errors you are ready to move onto the queries for enumerations.
6. Configure Enumerations
Enumeration definitions will be created for each query defined in the builder. Simply write your query according to the following rules to generate enumerations.
- Alias the column that represents the constant string value as Name
- Alias the column that represents the constant numeric value as Value
- Optionally alias the column the represents a comment as Comment
Note that any enumeration queries that are invalid will be highlighted in red, and a red dot will appear along side the button. The error message provided should help to resolve any errors.
At any time you can click the button to clear the errors and reload the objects.
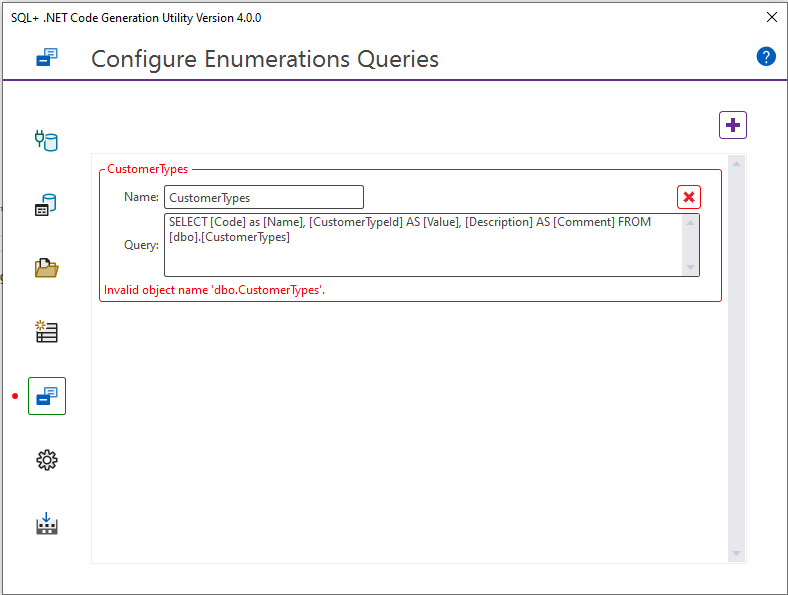
Once you have cleared any errors you are ready to move on to build options.
7. Configure Build Options
Choose any of the build options you want to utilize for your generated services. Each is outline below
- SQLClient - choose the SQL Client that you want to utilize. Options are System.Data.SqlClient, or Microsoft.Data.SqlClient - note that this is related to the nuget package you need to add to your service project.
- INotifyPropertyChanged - select this if you want your input objects to implement the INotifyPropertyChanged interface.
- IChangeTracking - select this if you want your input objects to implement the IChangeTracking interface.
- IRevertibleChangeTracking - select this if you want your input objects to implement the IRevertibleChangeTracking interface.
- Use Nullable Reference Types - select this if you want your input objects to utilize Nullable Reference Types interface.
Stay tuned... More build options are on the way!
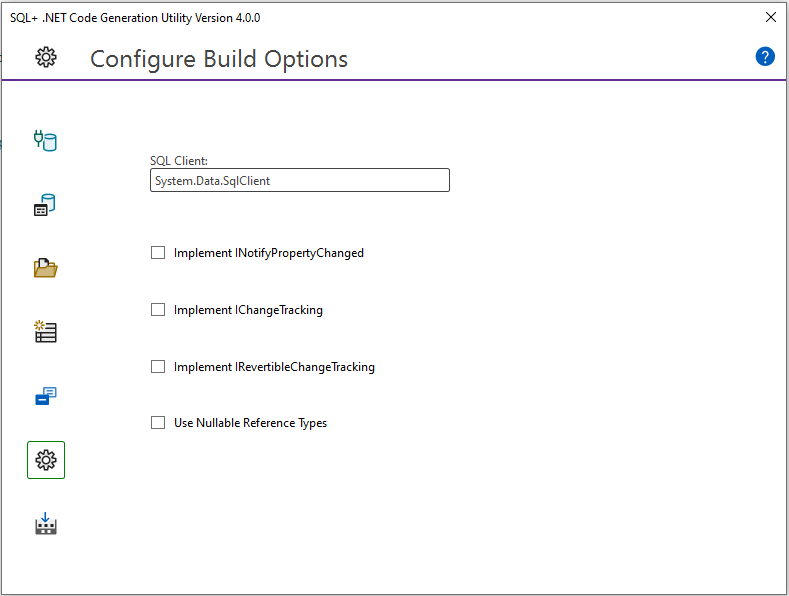
Once you are satisifed with your build options, you can proceed to the build area.
8. Run The Builder
Once you are satisifed with all your build objects, and have made your build option choices, you can simply run the builder. In the Build Project area, click the Build Project button.
